Paolo Di Lorenzo
26 Jun 2017 • by Paolo Di Lorenzo
My website/blog that you are currently reading is built using the Jekyll framework and hosted on Github Pages. Jekyll allows one to define webpage layouts, insert plugins, and automate much of the blog generating process. For example, on my website I have used a plugin that automatically generates all of the categories from the written posts. Similarly blog posts have a predefined layout that is used which allows me to focus on writing the content of each post and not worry about making sure each detail of the site (sidebar, CSS, etc.) is consistent throughout. Jekyll has the added benefit of generating a static HTML webpage from your layouts, stylesheets, plugins, and pages which tend to render much faster since there is no dynamic content.
With this power and flexibility comes a cost: in order to generate the webpages from the various files that are used, I need to run the jekyll build command from the root directory. This compiles the files into a static webpage located in the /_site folder. The contents of the /_site folder are pushed to my dedicated repository on Github which then hosts the website on Github pages. The files used to generate the website are located in the website-generator repository.
So how do I build my website if I don’t have access to my laptop with the cloned repo and a terminal to use? This might occur when I’m away from home and need to fix a quick typo. Or perhaps I’m traveling and want to submit a post about my experiences. Enter my workflow, which allows me to update my website from any computer with an internet connection, even an iPhone or iPad.
Automation with Travis CI
Travis CI is a continuous integration platform that is free for open source projects. When it is hooked up to a Github repository, it automatically builds the contents of the repo and runs any custom scripts or tests on the code within. The ability to customize settings and run shell scripts makes Travis CI very powerful in automating tasks.
Here are the steps that Travis CI executes for this site:
-
Changes to the website are pushed to pdil/website-generator
- Travis CI automatically begins the build process
- The
.travis.ymlfile lists the settings that Travis is to use, as well as any commands that should be executed before/after the build.
- The
-
On the Travis CI server we install some Ruby gems that are needed for the build (
jekyll,html-proofer, andjekyll-paginate) - Run
scripts/build.shbuild.shclones thepdil/_siterepo so that changes to it will be tracked and pushed back to Github- Next it runs
jekyll buildand checks for any HTML errors withhtml-proofer
- Deploy the generated website by running
scripts/deploy.shdeploy.shswitches to the_sitefolder, commits the changes, and pushes all of the files to pdil/_site
-
Github does all the work by hosting the contents of
pdil/_siteon Github pages. The CNAME file points the domain name (dilorenzo.pl) to the hosted content. - I receive a push notification from Pushover indicating that the build was successfully deployed (or that it failed).
That is the basic process by which my website is built, from sending the commit to viewing the content on this page.
Now I’ll briefly talk about the tools I use on iOS to post to this website.
Publishing from iOS
My workflow for editing and posting to this site on iOS revolve around two main apps.
Working Copy
Working Copy is a powerful git client that allows you to create and clone git repositories. I have my website-generator repository in Working Copy which lets me edit any file in that repo and commit the changes. As soon as the changes are committed, the Travis CI workflow detailed above is kicked off.
Coda
Coda is a wonderful code editing app by Panic. I use it to edit the files that I keep in Working Copy because of its great features. I especially love the webpage preview tool which lets you see how your content looks before you push.
Side-by-side
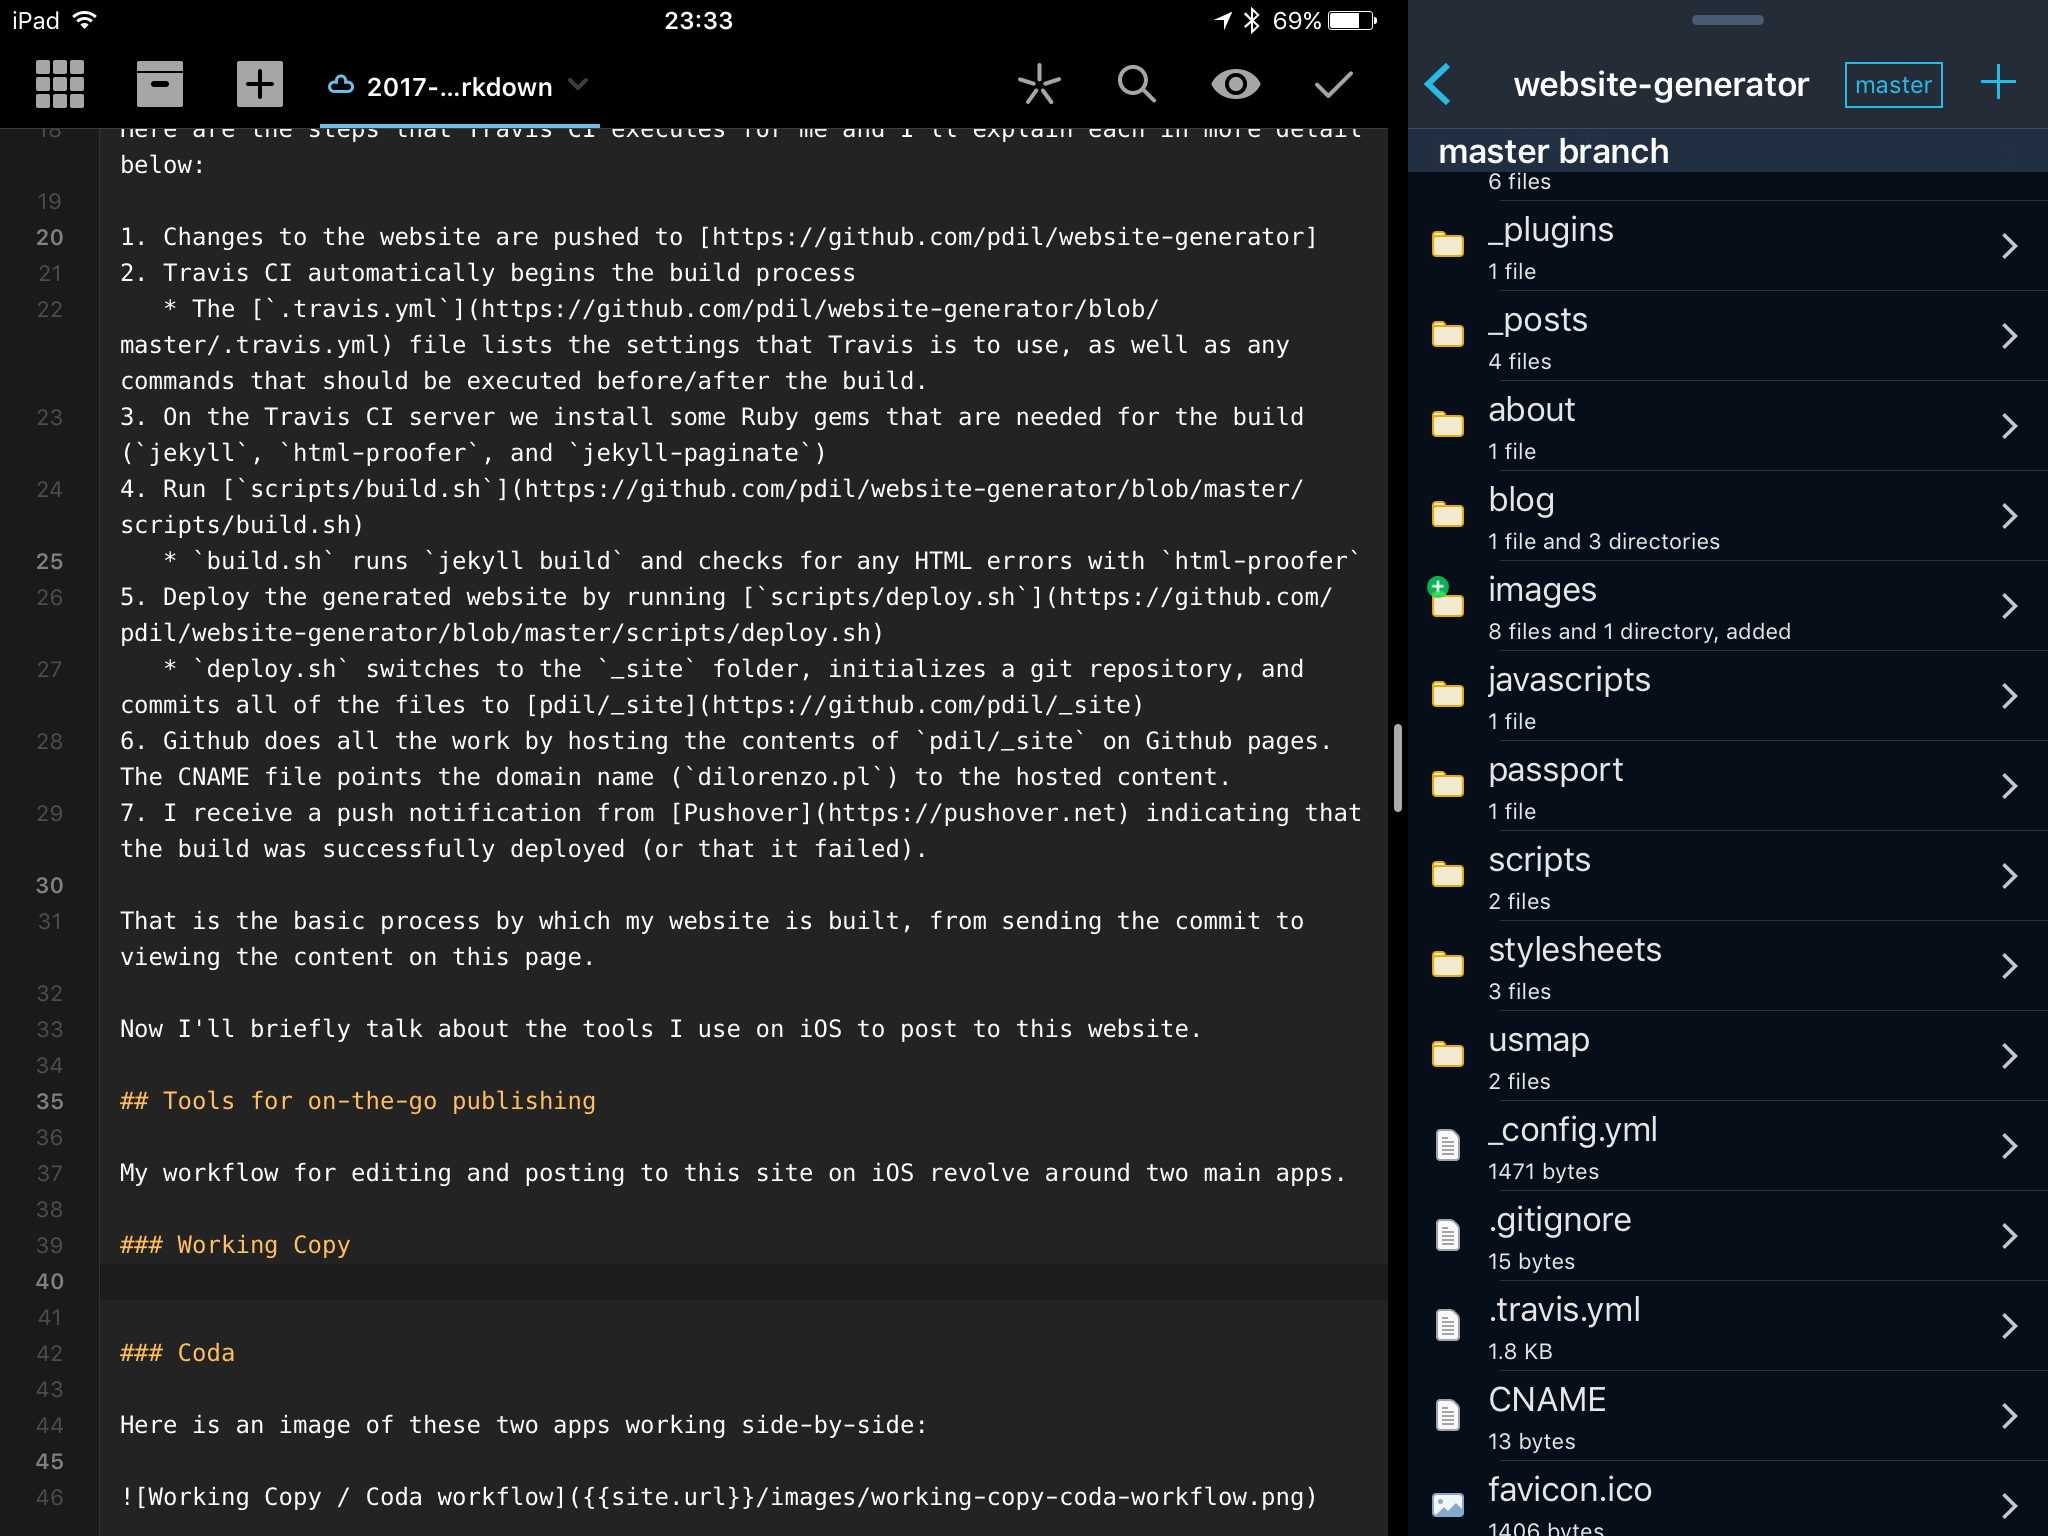
Both Coda and Working Copy are compatible with Webdav servers so anything you edit in Coda immediately appears in Working Copy when the server is running (even if the iPad or iPhone is offline).
Here is an image of these two apps working side-by-side:
The iPad is great for this because of its SplitView multitasking feature. I’m excited for iOS 11’s file management and drag-and-drop improvements to help even further.
I use an Apple Magic Keyboard for typing with the iPad.
Conclusion
The combination of web services and iOS apps really come together to provide a streamlined workflow for publishing blogs using Jekyll. In fact, the blog post you’re reading right now was written from my iPad Air 2! This process could be extended to push the generated website files to any hosting platform that one is using to host their site (such as Amazon S3, Linode, etc.).
Links
The following links contain services and products that were mentioned earlier in the article, for your reference.
- website-generator repo (contains this all files used to generate this website)
- _site repo (contains the generated files that actually present the site)
- Travis CI (continuous integration platform)
- Pushover (automated push notification service)
- Working Copy (iOS git client)
- Coda (iOS web development IDE)
- Apple Magic Keyboard (wireless Bluetooth keyboard)
